The feather effect is a subtle addition to any image. Unfortunately, it’s not easy to feather on more than one side in Indesign compared to Photoshop. Here are two options to get it on multiple sides.
OPTION 1
This one is for a very soft feather effect.
Step 1
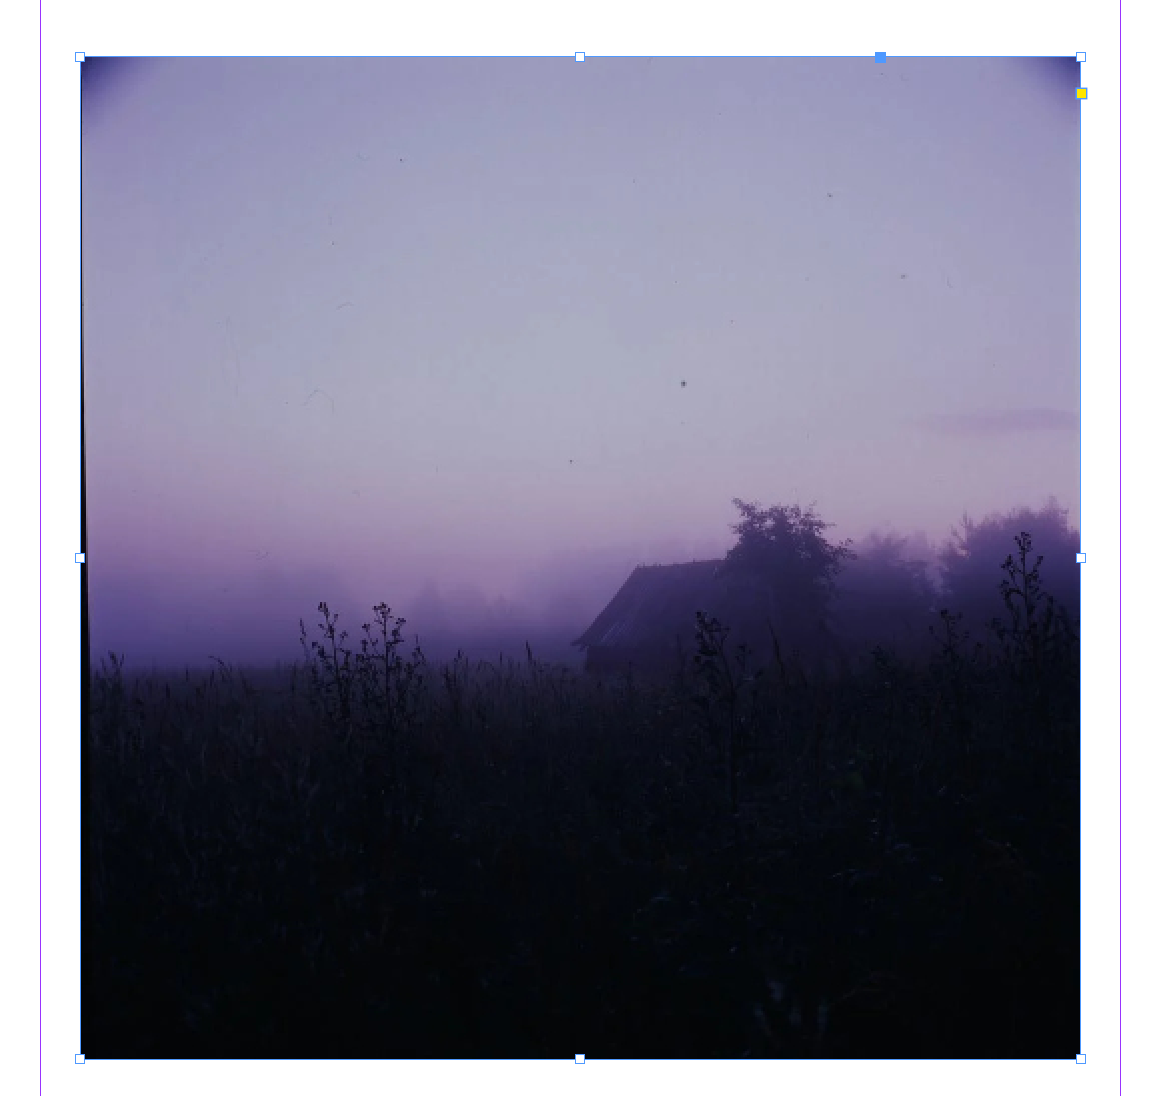
Click on the image to get the bounding box to appear.
Step 2
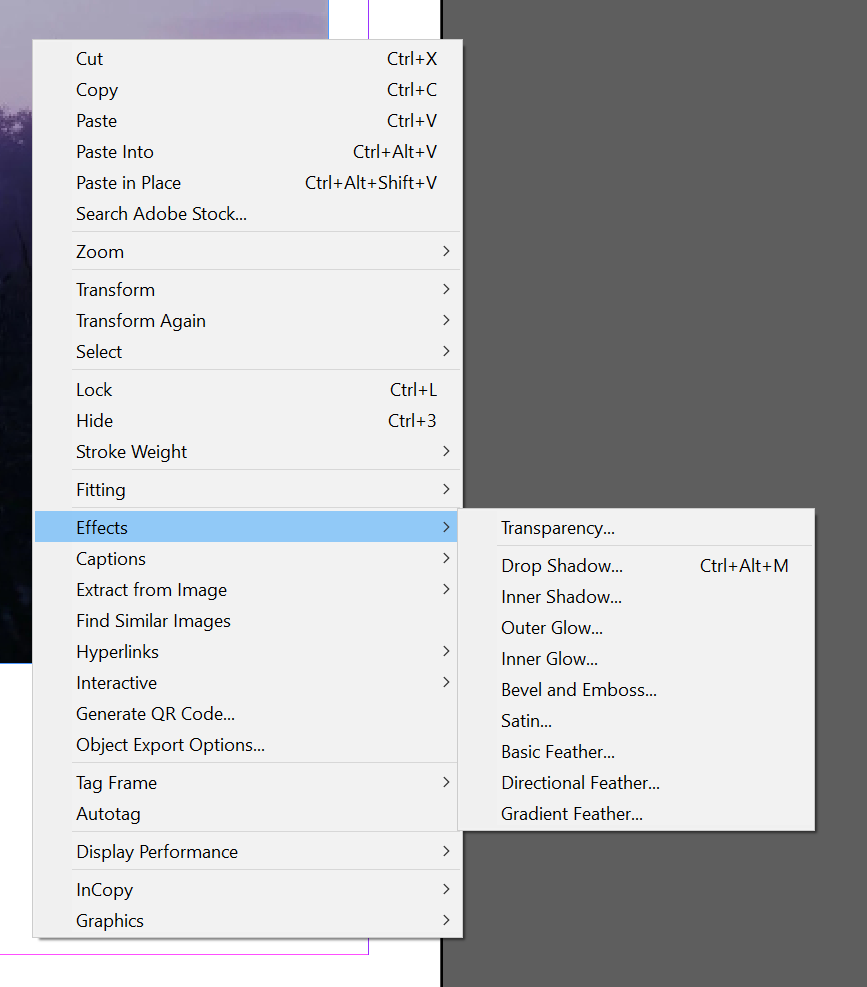
Right-click on the image and click Effect Gradient Feather.
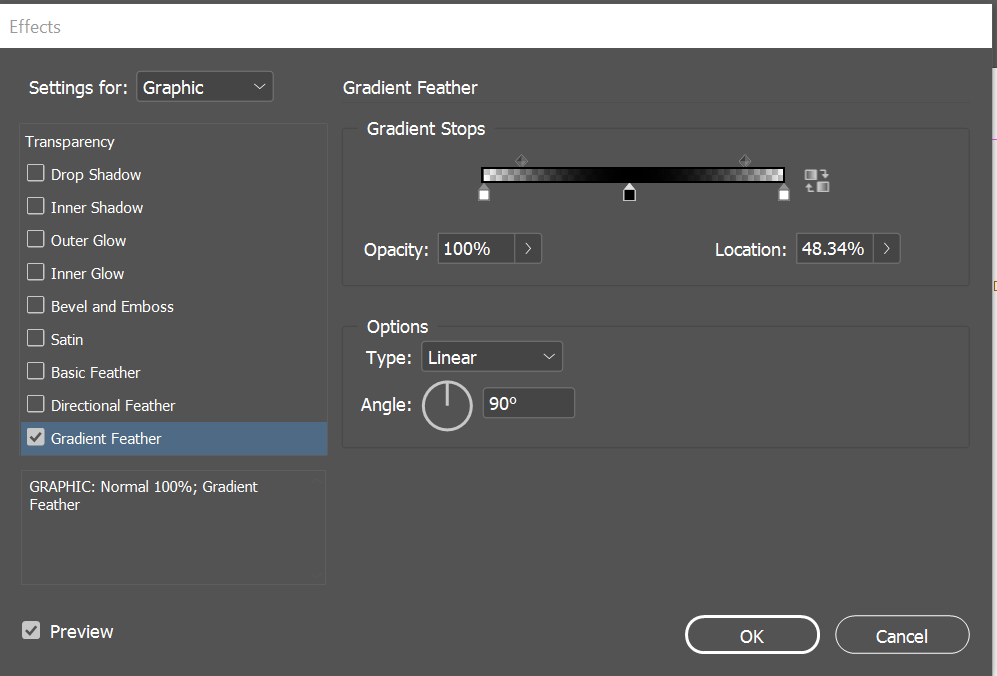
Step 3
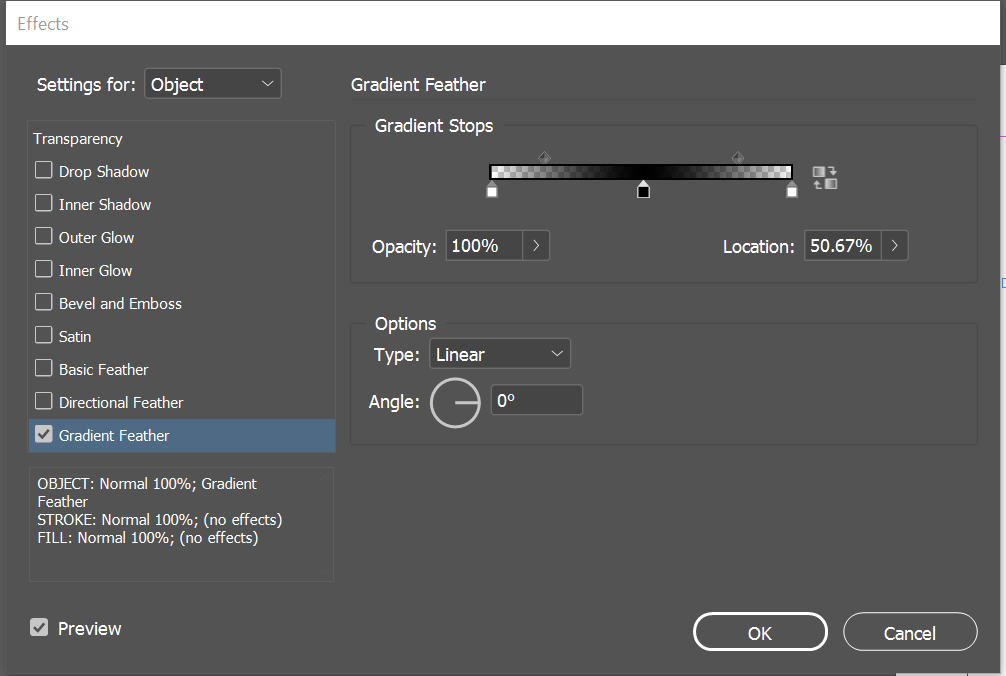
Make sure the Gradient Feather and Preview are checked. To create the feather effect on two edges, make the gradient stop like the one below. The first one is 0%, the middle 100% and the third 100%. You have to click on the gradient stops bar to add the third. The type should be linear and angle 0 degrees. You can choose radial, but it would make a circle feather effect rather than a hard edge.
You can do just one side or two sides, and it’s up to you!
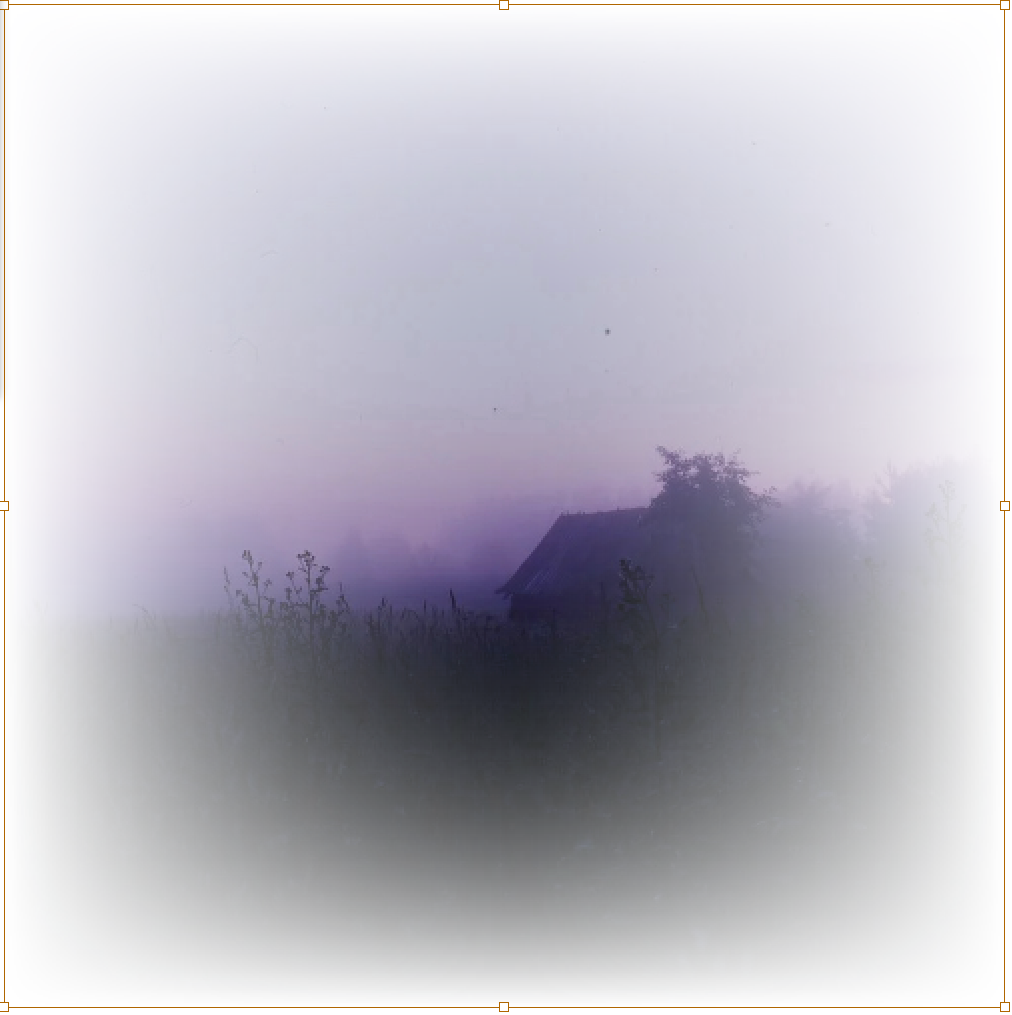
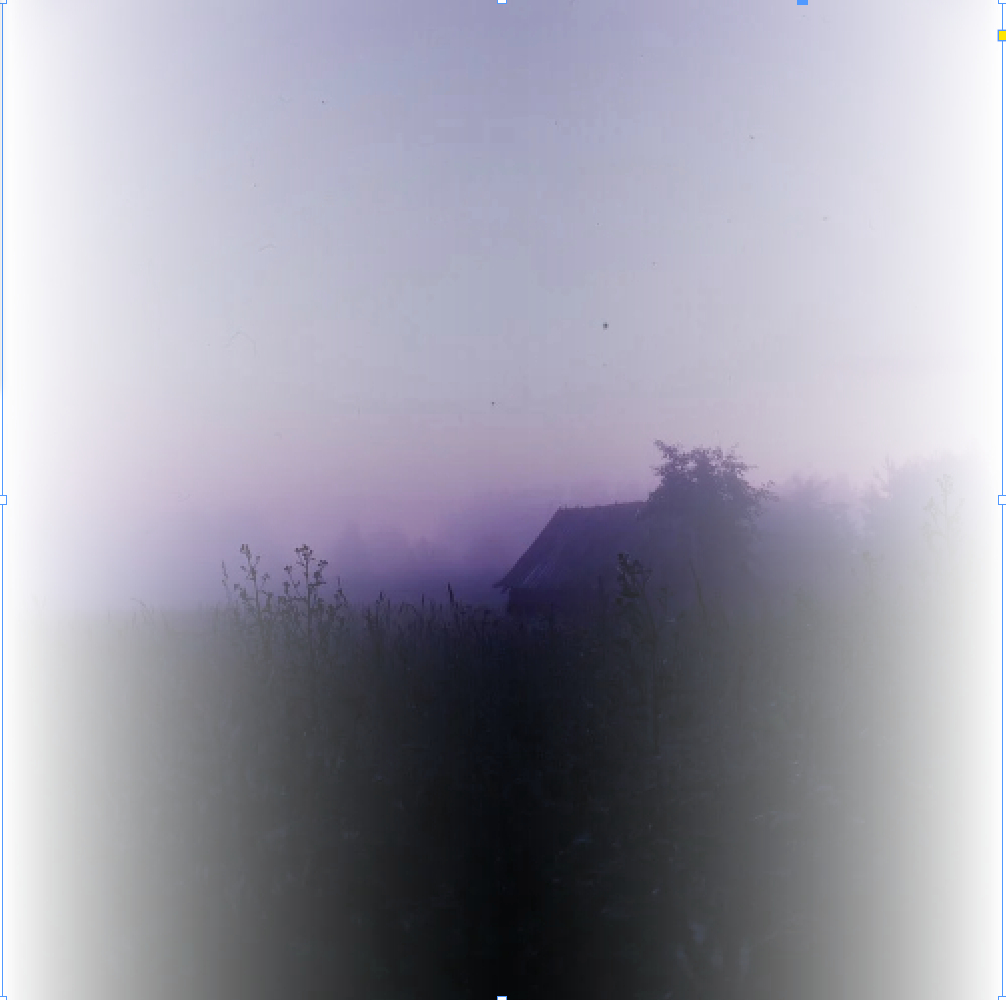
You can see the EEffectbelow.
Step 4
Now we got it on two sides. To do the top and bottom double click the image. The bounding box should now be a different colour. Repeat Step 2. Which was right-click go to EEffectGradient Effect.
Below are the numbers. Again make the GrGradienttops the same as before, but the angle is 90 degrees.
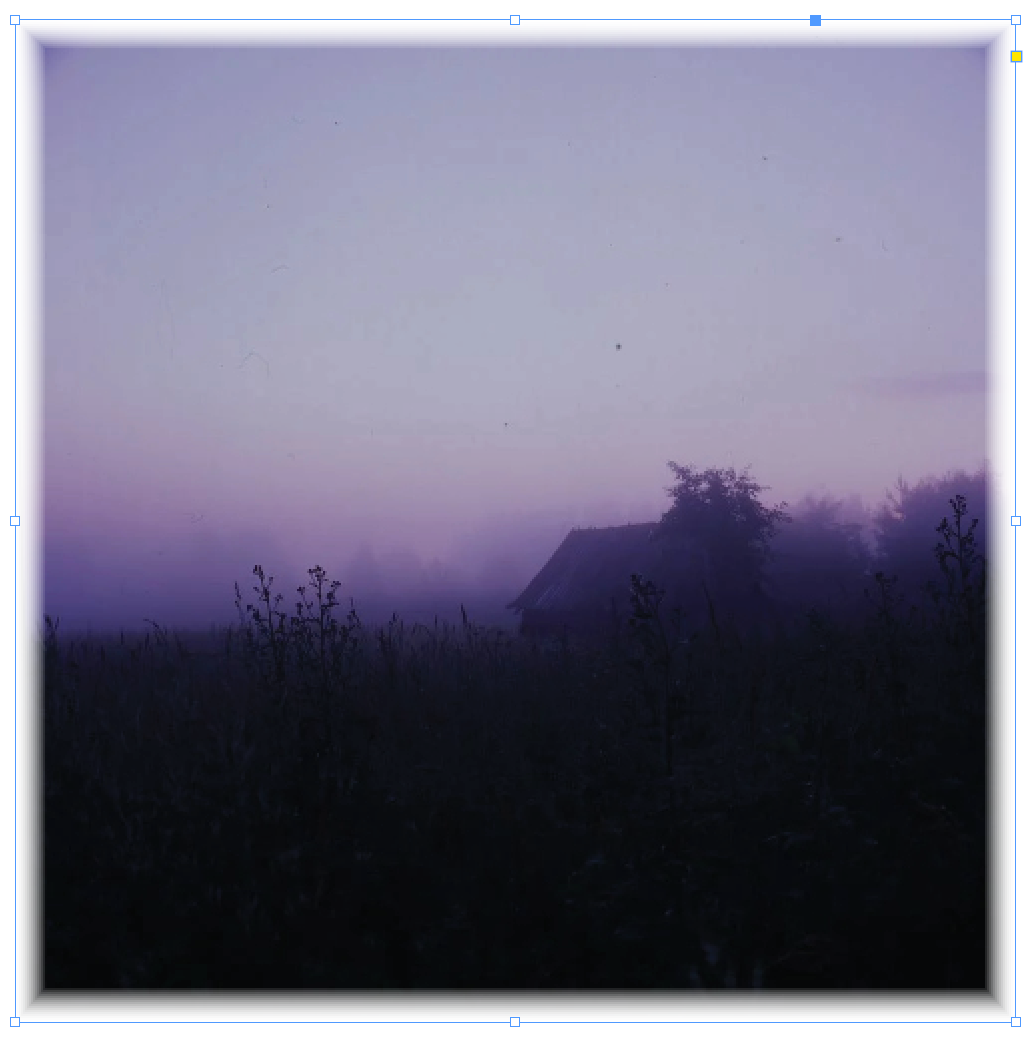
You can see the result below! A soft feather effect on four sides.

OPTION 2
This one will give a tighter, hard feather effect.
Step 1
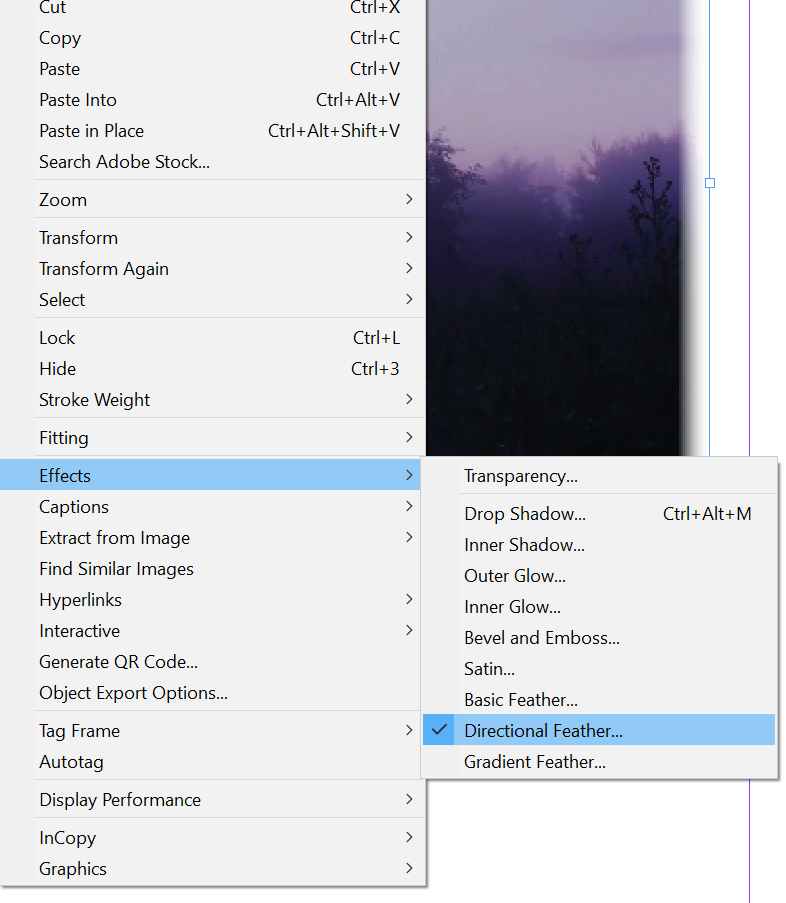
Double click on the image to get the image’s bounding box. Right-click and select Effects > Directional Feather
Step 2
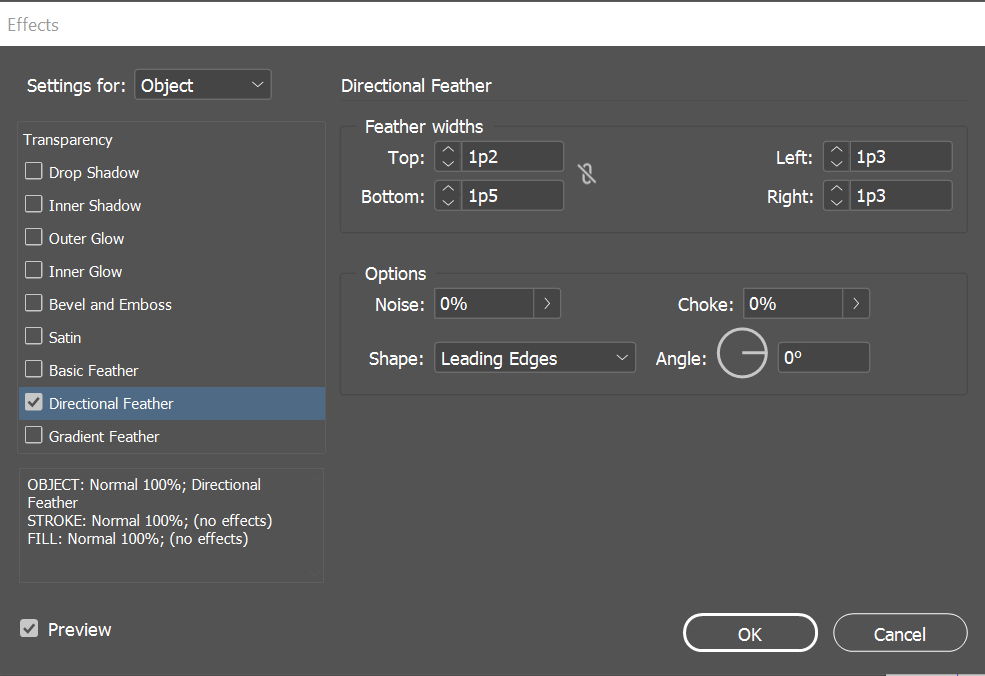
Make sure Directional Feather and Preview are both checked. In the feather widths section, you control how many feathering you want on the four sides.
The Noise option will make the grGradientrainy.
The choke option will determine how soft the feather is.
The shape of the edges doesn’t matter too much.
Here is how it looks! It gives a harder feather effect. It can also be used with Gradient Feather to create some cool effects.
Hope that helps! Happy Creating.
Leave a Reply
You must be logged in to post a comment.