INTRODUCTION
Marvelous Designer is the program to create 3D clothing, not just for SIMS but the entire gaming industry and beyond. While you can create clothing in other 3D Programs, the tools and interface in Marvelous Designer are just better. Here I will go over the basics of creating clothing for the SIMS game. Specifically, SIMS 4. You can get a more in-depth look at it by going to their website: https://www.marvelousdesigner.com/
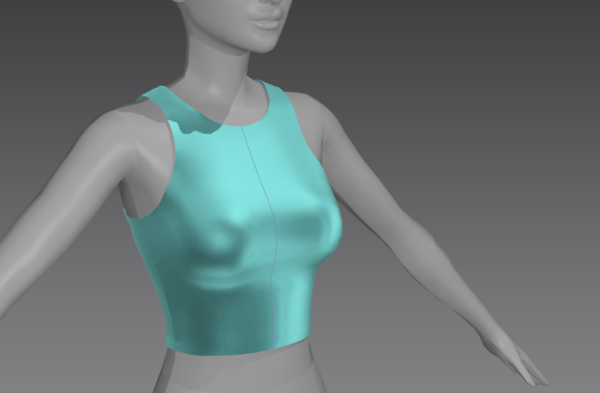
I’m using version 9 for this tutorial and creating a tank top.
STEP 1: DOWNLOAD THE AVATAR
Like sewing, you need a dummy! Here it is called an avatar instead. There are 5 in total: Female, Male, Child, and toddler with and without a diaper. Below are the download links:
Child Avatar
Female Avatar
Male Avatar
Toddler with Diaper
Toddler without Diaper
Once you’ve downloaded it, open it in Marvelous Designer by going to File>Open>Avatar.
To navigate around the 3D avatar that is on the left side of your screen. Here are the following controls:
Zoom – use the scroll buttons
Rotate around the avatar – use your right button and hold and move
Pan up and down, side to side – Hold down the middle scroll button
You should see an avatar outline on the screen’s right side. This is where the pattern will appear.
STEP 2: CREATING THE PATTERN & SEWING
To start creating a pattern, click the Polygon tool as highlighted below

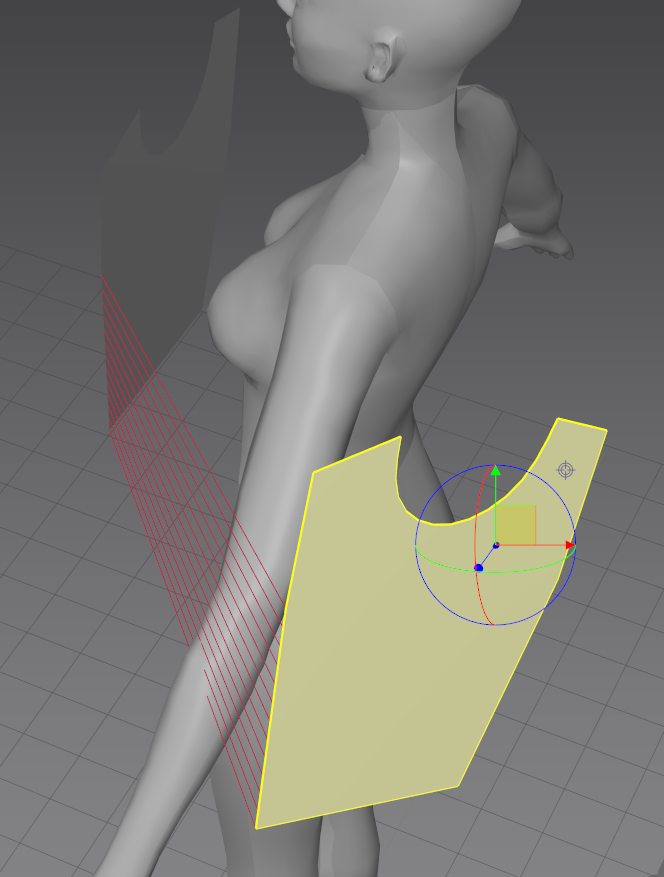
You are using the avatar outline as a guide. You are going to create the front half part of the t-shirt. You will click the first point, then the next till you close the loop and complete the pattern. It should look something like his.
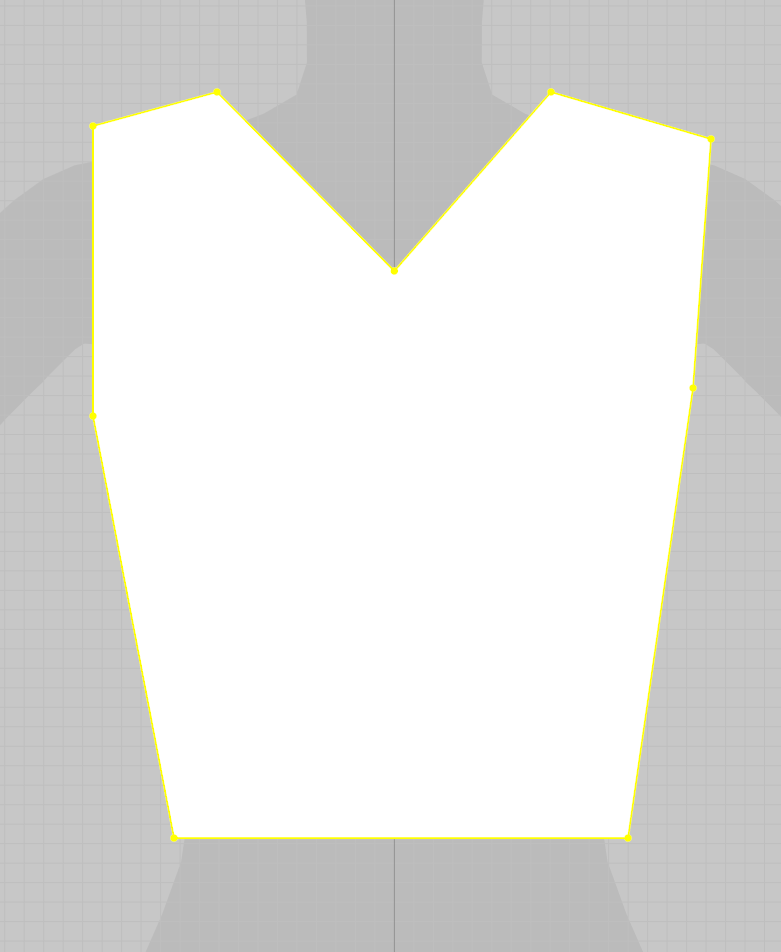
The measurements won’t matter to much right now as you are just getting the feel of using the tool. As you advance, you can get more precise.
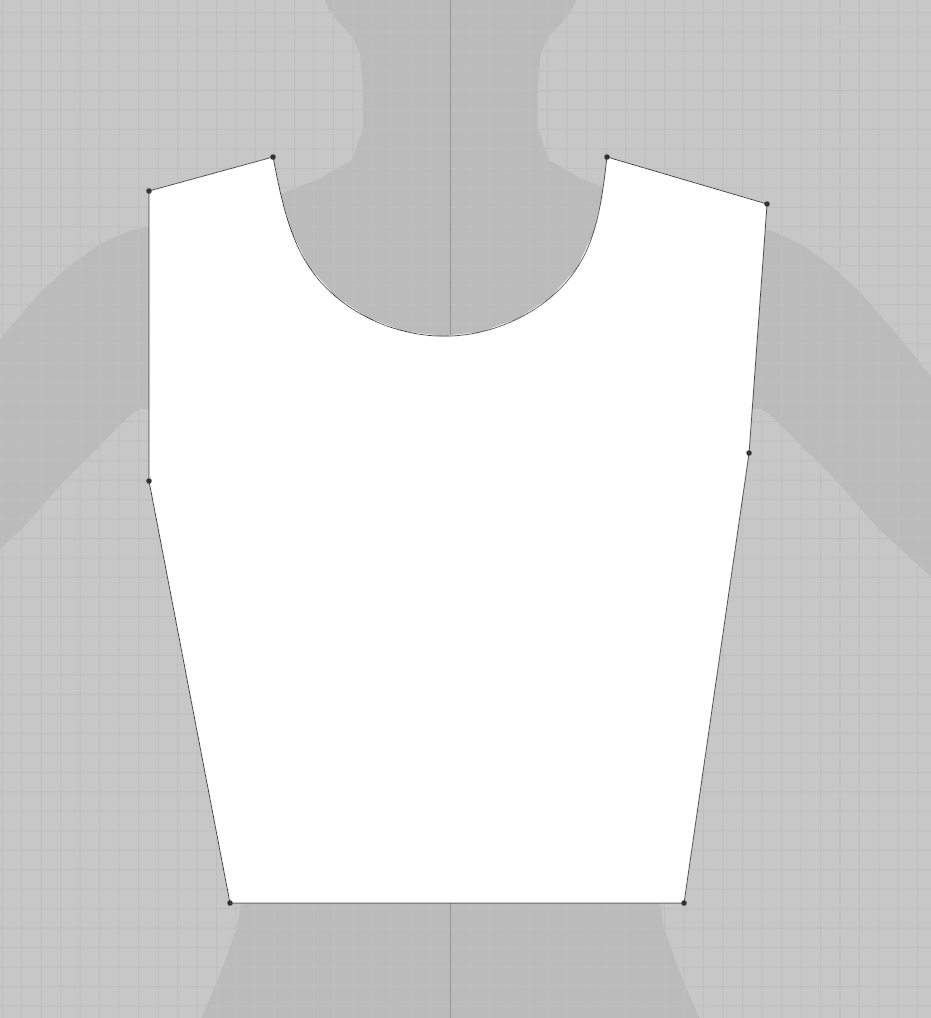
I want to curve the collar to give it a rounded neck instead of a “V” Neck. To do this, go to the “Edit Curve Point” Tool. (Other option is to right click the point and choose “convert to curve.”
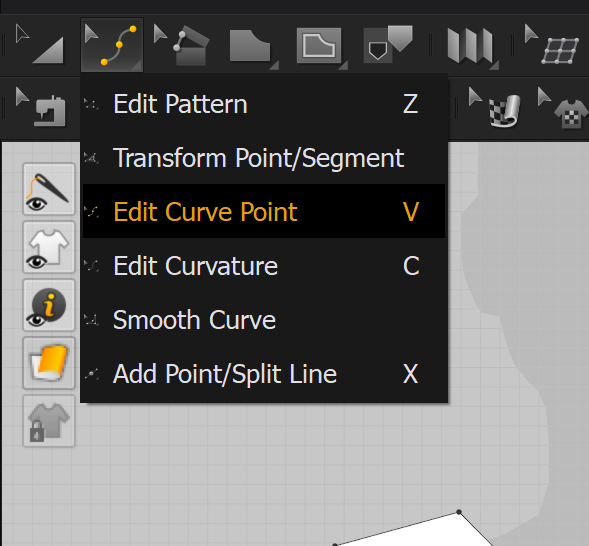
Then click on the line you want to curve. In my case, it is the half of the collar. Click in the middle and then drag.
Click “A” to return to the transform tool/selection tool.
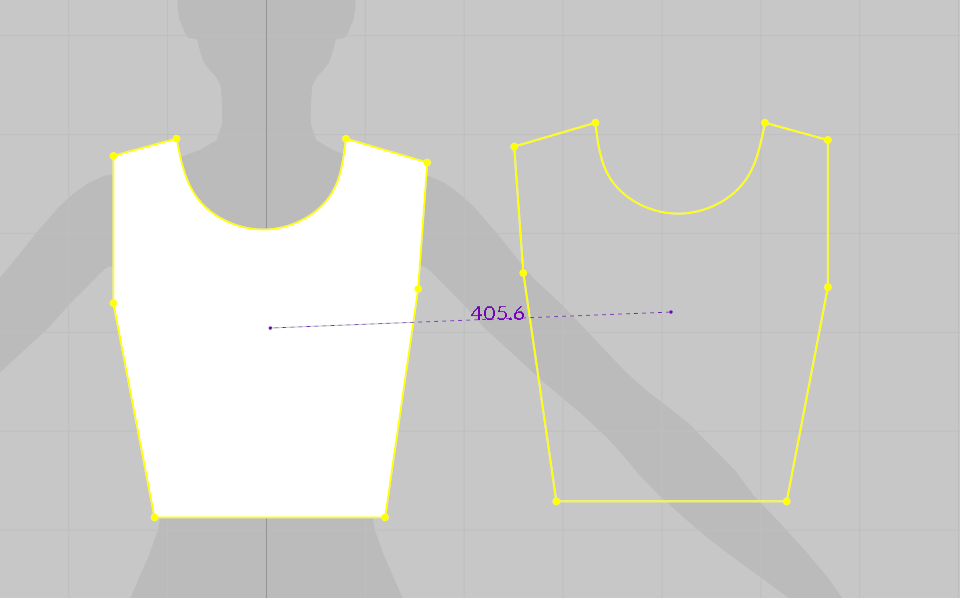
Click on the pattern, right-click and select “Symmetric Pattern.”
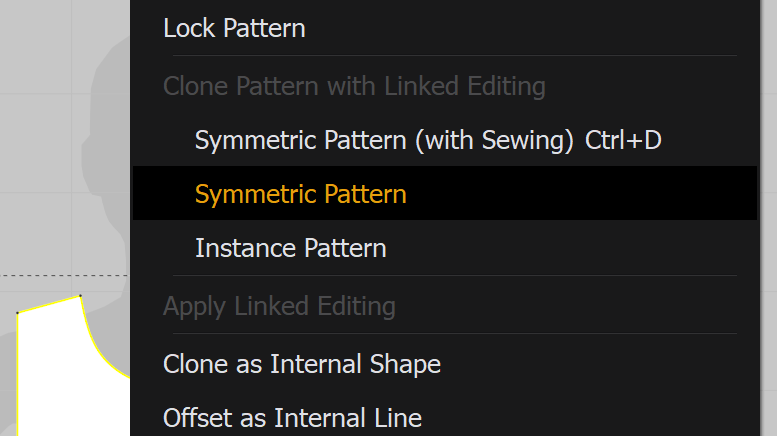
The outline will appear, and drop it next to your original pattern.
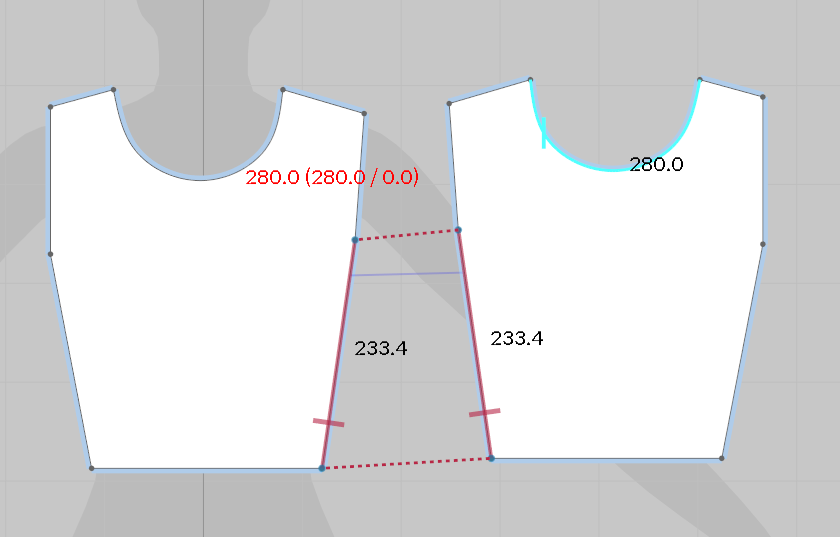
Next, click the segment sewing tool. You are going to “sew” these two pieces together.

Click on the middle line in the pattern, then click the line next to it. You should see the dashes to show you’ve successfully sewed the two pieces together. It will also show on your 3D avatar.
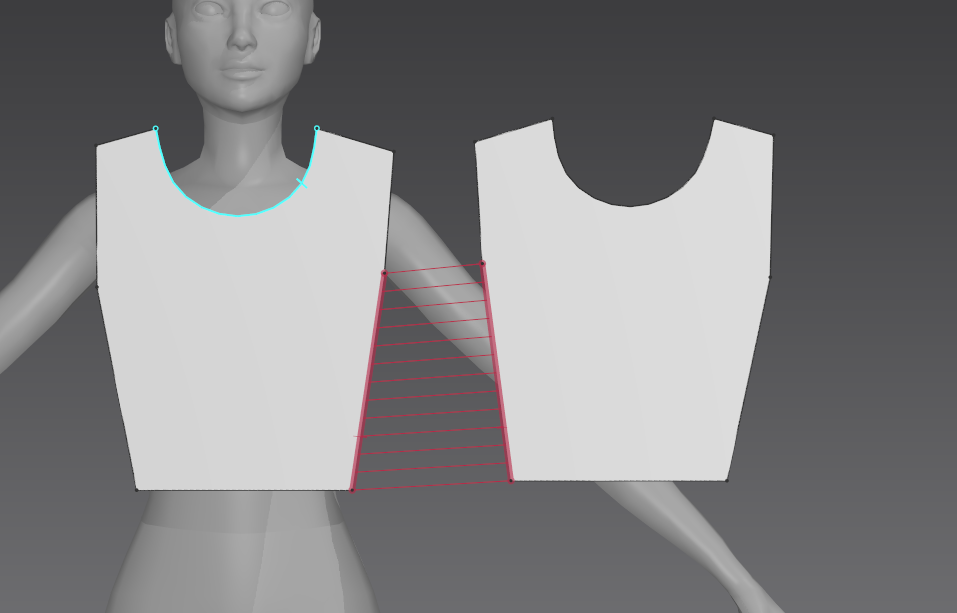
Switch to the 3D View. There is an easier way to do this, but I will show the manual way to stitch the back pieces to the front pieces. As you can see, the piece hovering in the air. Move the second piece, which is the back piece to the back of the avatar.
You can see dark side, which is hidden and the white side, which is shown. You will have to rotate it to get the sides where it should be. The sew line helps you orient your pieces a little easier.
Select the two back pieces again. Drag then by clicking the left click, holding down, moving your mouse and rotating simultaneously. You are moving them to the back of the avatar.
Next, go back to the sewing by segment tool.
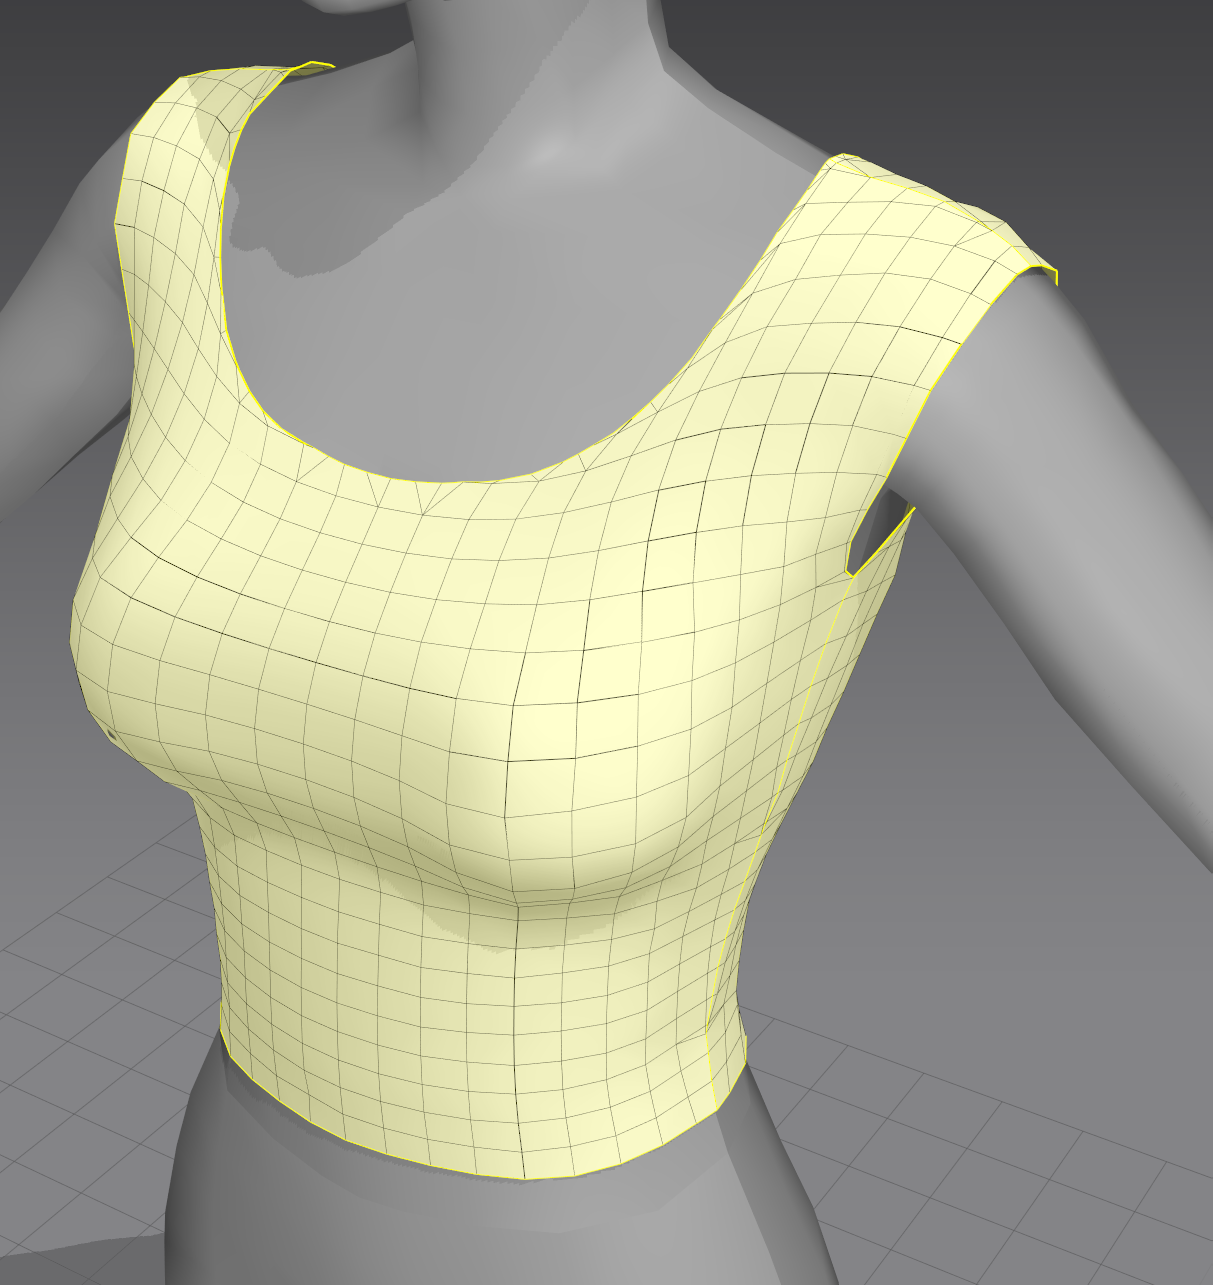
You can click on the sides and the corresponding opposite side either in the 3D Window or the 2D Pattern Window. This is how it should look. None of the “threads should be clipping through your avatar. The lines should also be straight.
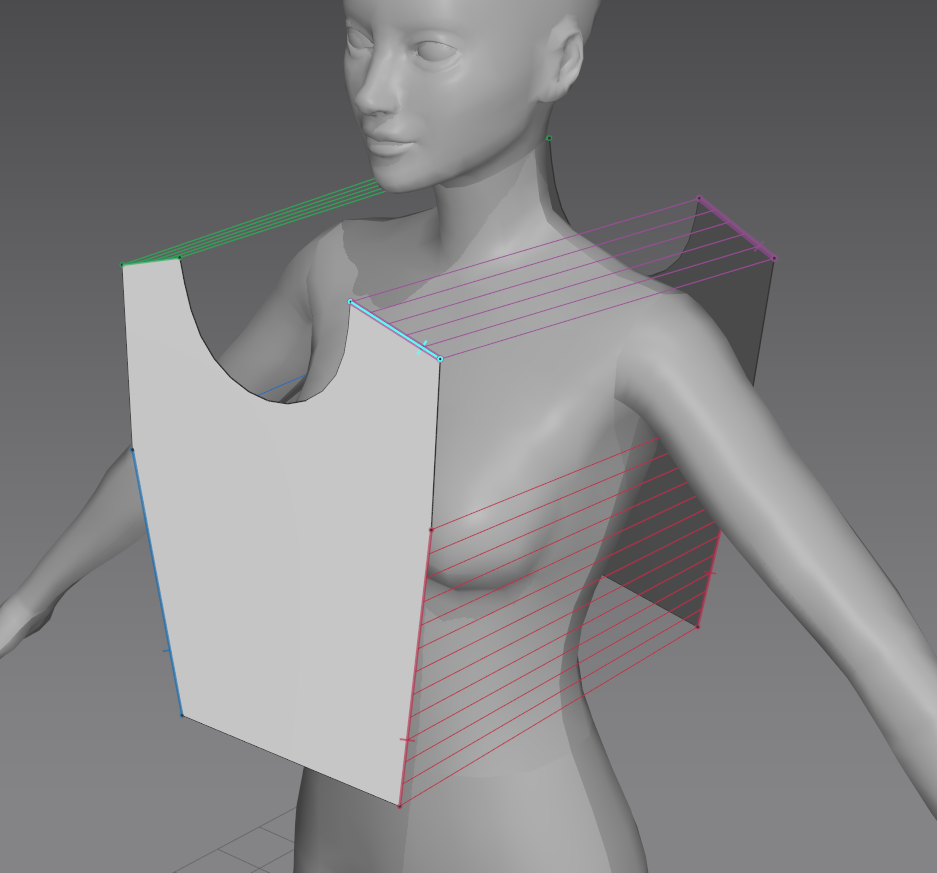
These are the sides that I connected. Which is the two sides, and the top of the tank. Remember you click the edge you want and connect it the other edge.
Now we can stimulate! At the top of the 3D window, you should see a down arrow above the walking icon. Click it.
The pattern will automatically get sewn and form around the avatar.
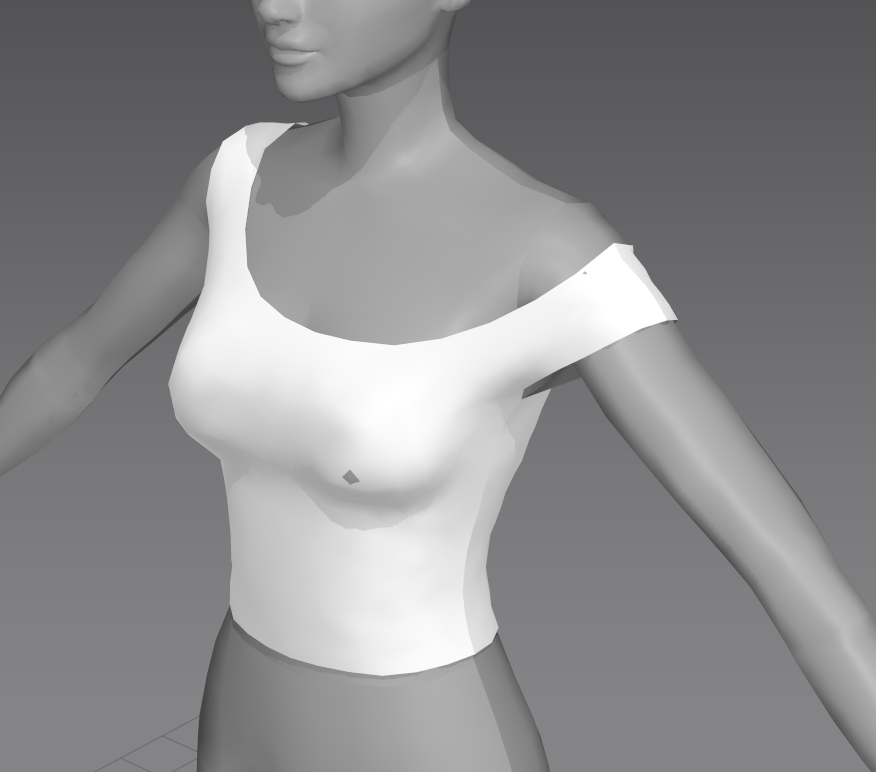
You may see some holes in your clothing. Hover over it when the stimulation is one (The arrow is highlighted). You will see a hand, click the tank, it will turn yellow and you can tug on it to fix it. If you can’t fix it here, you can fix it in a blender later.

Other Notes
In the bottom right corner, you will see the property editor.
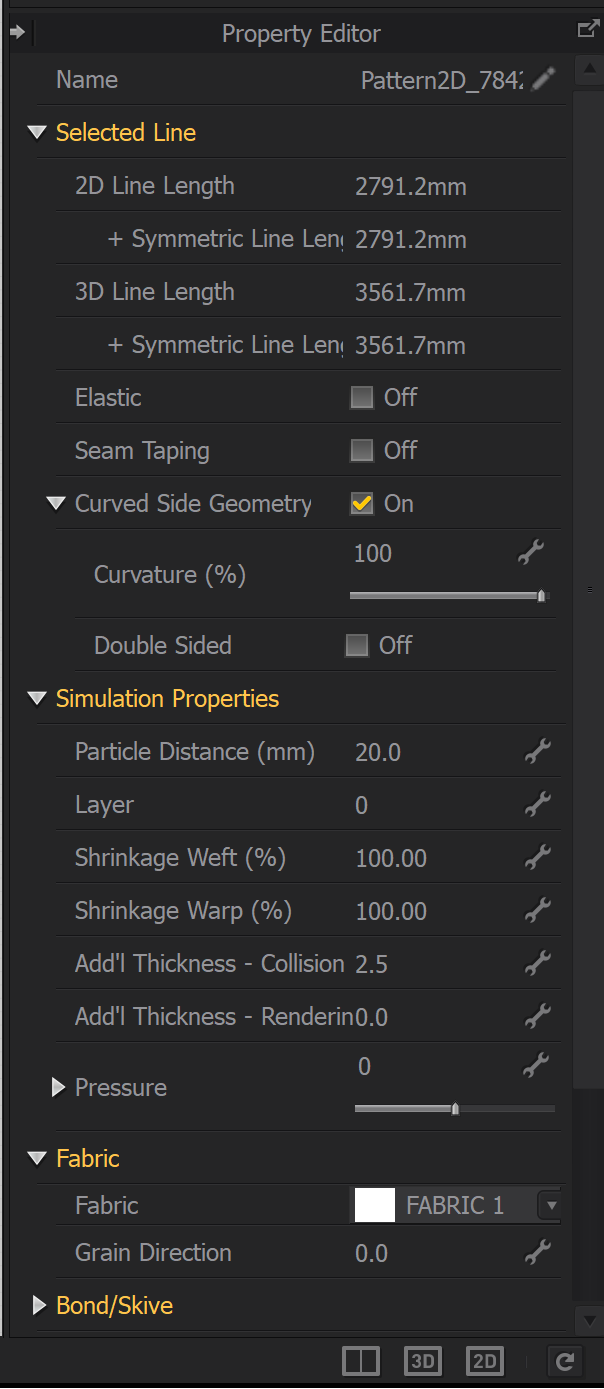
Here you can adjust the fabric. I will highlight the ones I found useful so far.
- Particle Distance – Is the distance between two points on faces. You can use this to reduce the number of faces. You can imagine them like a metal sheet. One big sheet will be hard to curve. However, it’s more malleable when the metal sheet is split into many linking shapes, like chainmail. It is similar here. If your File is too large and you want to reduce it. This may be a solution.
- Shrinkage Weft – This number will determine how loose your fabric/mesh is. The lower it is, the tighter. You can mesh with the controls here, depending on the look you want.
- Shrinkage Warp – This number will determine how loose your fabric/mesh is length-wise. The lower it is, the tighter. You can mesh with the controls here, depending on the look you want.
- Remesh – When creating 3D objects, you will often see them being cut up in ‘faces.’ Remesh is a feature in Marvelous Designer to reshape those faces and use fewer faces. The fewer faces, the lighter your File will be.
The default faces are triangles. To see the faces, go to the corner of your 3D simulation window. There will be a row of icons. Go to the fabric (4th one). Then go to the Mesh Fabric. It will change the View.

Here is my mesh:
Click CTRL + A on your pattern. Then check the “Remesh” function. Here is what it did to my mesh. You can see its fewer faces, and it’s square now. Sometimes this is the best option, but sometimes it isn’t because Blender will read it oddly. It is up to you.
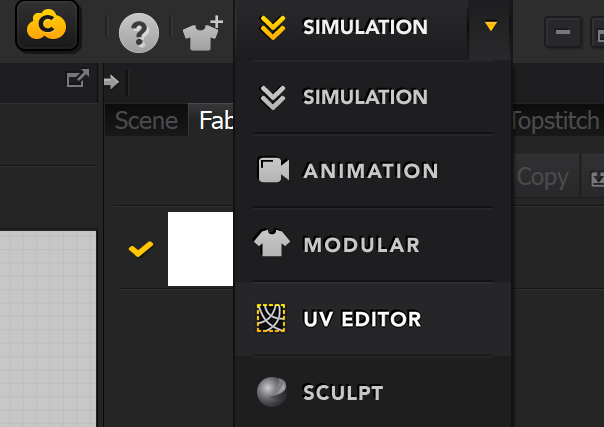
One final tip. Go to the upper right corner, where it say “SIMULATION”. Click, a drop down will open and choose UV Editor.
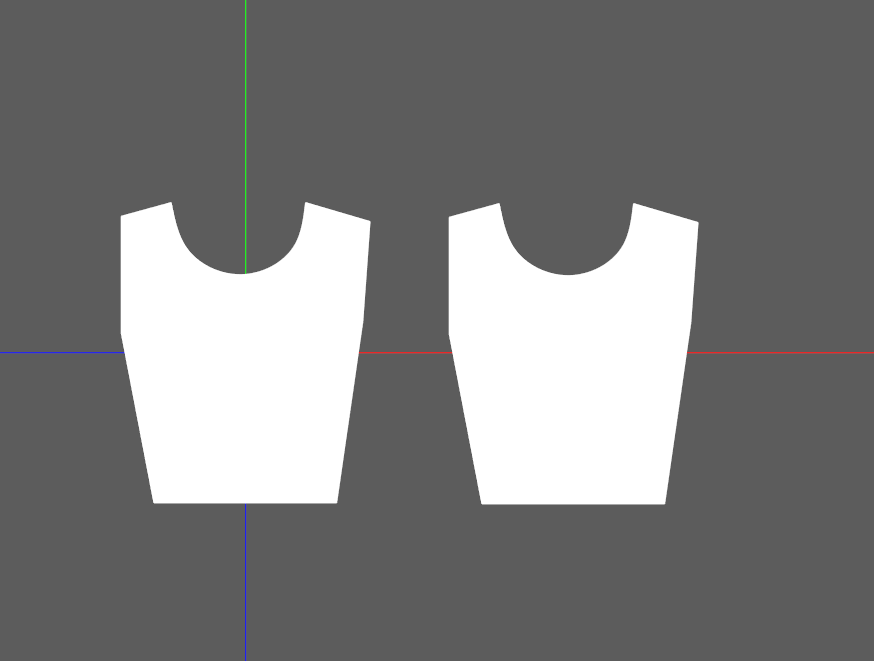
When you export your pattern, sometimes in Blender, it will overlap. You don’t want that. Go to the UV Editor and move your pieces around to fix them. Below, they were overlapping and I just moved it.
And that’s it! The Next step is to import it into Blender to “code” and adjust it for SIMS.
If you have any questions, let me know. There is so much more to Marvelous Designer than I showed here. Happy creating!
Leave a Reply
You must be logged in to post a comment.