Author: Lucy Nguyen
-
I see “Staged for Publish” in my Blog Posts/CMS – WebFlow
When you see “Stage for Publish,” that means it’s ready for publishing. It won’t appear on your site till you publish your entire site. To do this, go to the corner of a page, click the “Publish” button and then choose “Publish to selected domains.” It will then appear, and that’s it! Hope that helps.
-
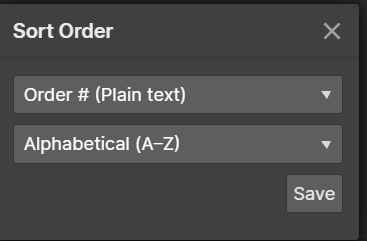
How to create a custom order in CMS lists for Webflow
This is the only method I found so far that works. Go to the CMS settings and add a new “Custom Field,” then choose the plain text option. Call it “Order #” or whatever you like. Save the field, then save your changes. Go into your CMS item, and it should show up like this.…
-

How to Change the background color in Figma
You may have put your settings to dark mode and tried to change it, but sometimes it doesn’t change the background. Here’s how to fix it. Make sure nothing is selected. Go to the “Design Panel” On the left side, and under the “Background” section, change the colour there. That’s it! Happy Creating!
-
How to change the colour of flat icons PNGS in Figma
If you downloaded the transparent flat icon in a png format and want to change the colour in Figma. Well, that’s what we are going to do today. First, insert the icon and then select it. Then go to the effects section in the right side panel, and choose the “Inner Shadow” effect. Open the…
-
How to add captions to Lightbox Multi-Images and Singular Images for CMS Items
Credit goes where credit is due, and I only figured this out because of a Webflow tutorial and due to Sygnal attributes for the codes. STEP 1 – Add the Library There are currently no configuration options for this library, so we’ll use a no-code integration approach. Add this CSS script to the HEAD of…
-
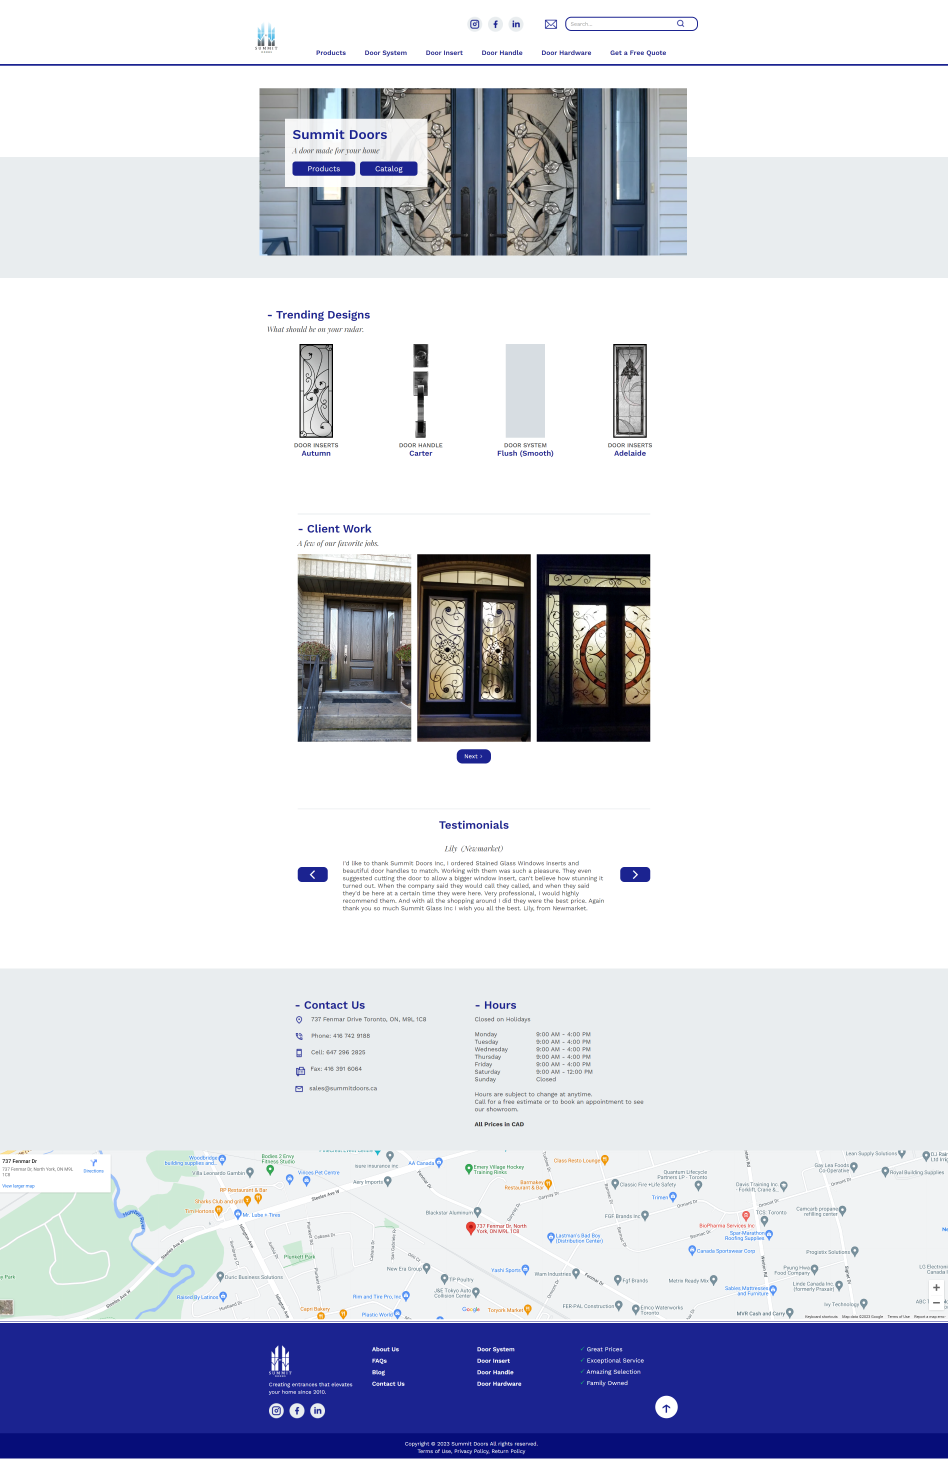
Website: Summit Doors
Project: I was tasked with refreshing the Summit Doors website. Year:2023 Program Used:Webflow, Figma, Adobe Photoshop & Illustrator Link:www.summitdoors.ca Homepage: Before After Product Page This is where the majority of the work was done. Before After Individual Product Page
-
![Element does not have an [lang] attribute – Webflow](https://pixellucy.com/wp-content/uploads/2023/03/language-code.png)
Element does not have an [lang] attribute – Webflow
To fix this in WebFlow, go to your website settings. Under the “General” tab, scroll down to the “Localization” section. Then, under “Language Code,” type in your website’s language. Here is the language code. And that’s it! Hope that helps, and happy creating.
-
How to make the arrow rotate in the Dropdown menu in Webflow
They certainly don’t make it easy to figure some stuff out. I didn’t want to use any code or build it from scratch. Here’s how I figured it out on my own after tinkering around. Tutorial Make sure you are the parent of the whole drop-down container. Next, ensure you name your Icon by going…
-
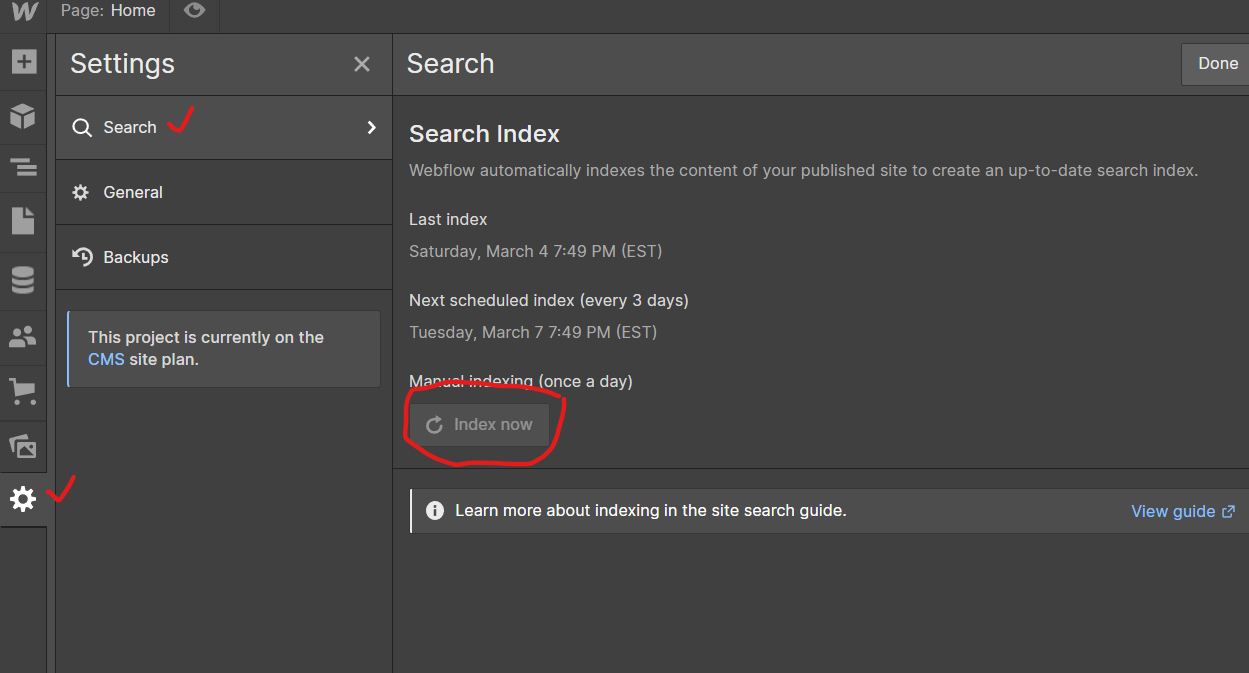
Webflow Search Results aren’t showing on my new site
When you launch your website quickly, you might not see search results. One possible reason is that you haven’t indexed the search results yet. To do this, go to the settings in the editor view. Then go to “Search” and then click “Index now.” It will do it once a day when your site is…
-
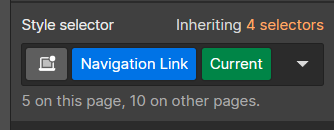
How to fix the Webflow Link’s current state in Navbar
For some flipping reason, this is a glitch that has never been fixed. Here’s what you need to do. I figured it out after watching videos, reading, and getting a headache for half an hour. What is the current state? It states that your link can be in. We are familiar with hover, pressed, none,…
-

How to put a magnifying glass icon in the search bar for Webflow and make it function by clicking and enter button
I don’t like the search button and want to use an icon in place of it in Webflow. If that’s what you are looking to do, you’ve come to right place. First, go download an icon that you like. You can go to flaticon for some. You then have to resize it to the size…
-

5 Strategies To Increase Points in Google Maps
You already know the standard ways to get points in Google Maps. Here are my favourite ways to earn points. Take Lots of Pictures: Photos are worth many points; you can take as many photos as possible of a place. Front, Interior, Food, and Deco are the ones I usually hit. Take Videos: Videos are a secondary…